
Chipless Cookies Recipe

Have you ever wondered why cookies need chocolate chips to be delicious? What if the secret to a perfect cookie lies not in what you add, but in what you leave out? This chipless cookies recipe challenges everything you thought you knew about baking the perfect cookie, delivering a buttery, rich, and utterly satisfying treat that stands beautifully on its own.
Chipless cookies are gaining popularity among home bakers who appreciate simplicity without sacrificing flavor. These golden beauties showcase the fundamental elements of cookie perfection: butter, sugar, vanilla, and flour working in perfect harmony. Whether you’re out of chocolate chips or simply want to experience cookies in their purest form, this recipe will become your new favorite.
The beauty of chipless cookies lies in their versatility and timeless appeal. They’re the canvas upon which you can build countless variations, or enjoy them exactly as they are—crispy on the edges, chewy in the center, and absolutely irresistible. Let’s dive into creating these magnificent treats that prove sometimes less truly is more.
Table of Contents
Ingredients List
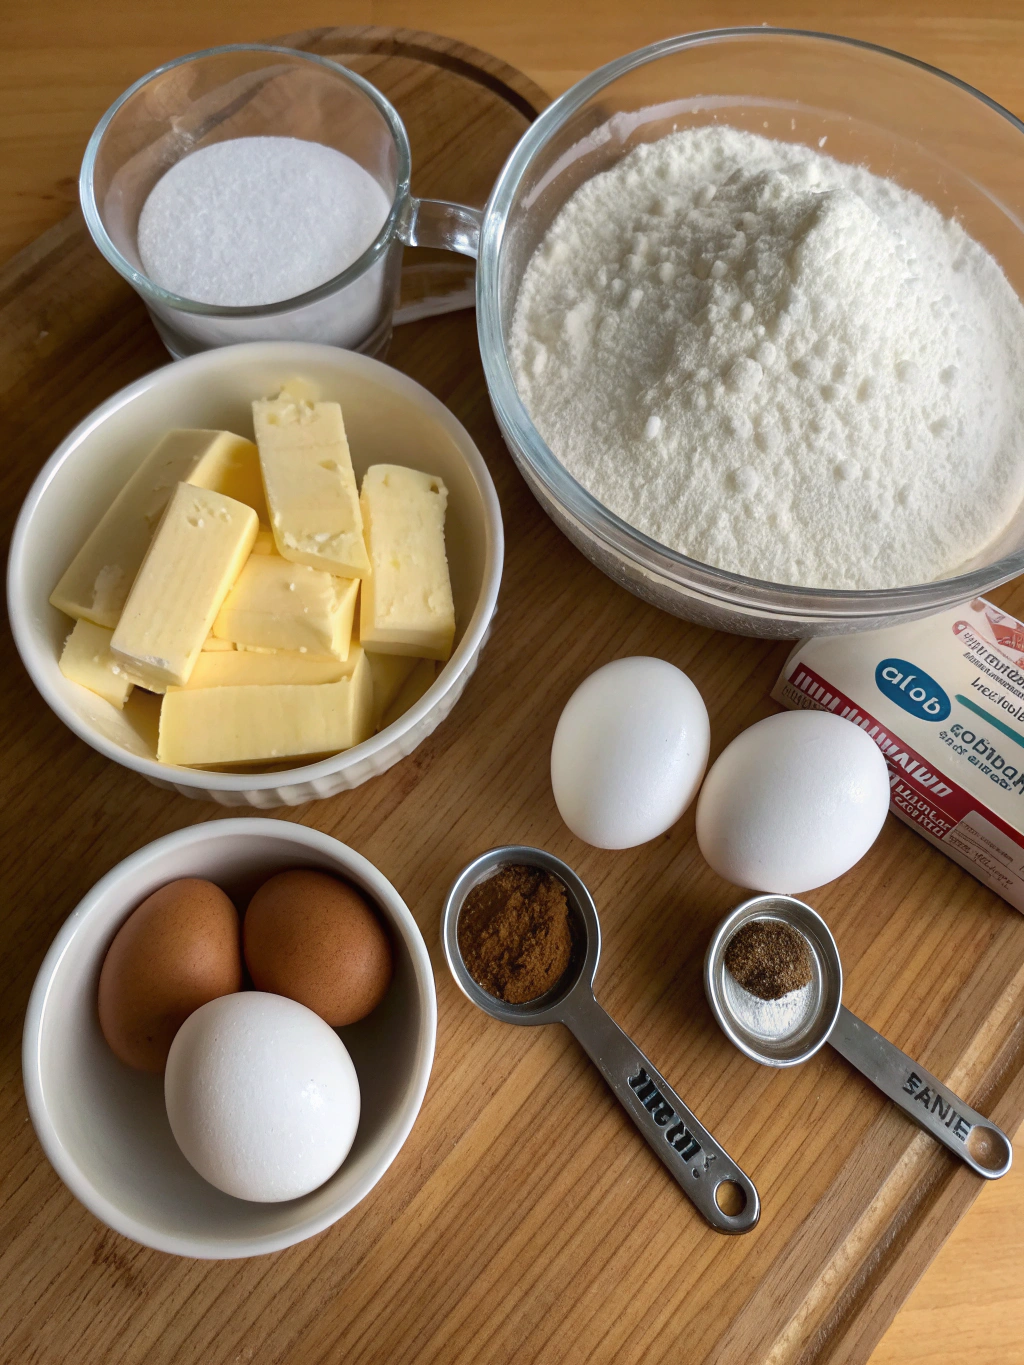
Gathering your ingredients is the first step toward cookie perfection. Each component plays a crucial role in developing the texture and flavor profile that makes these cookies extraordinary. Here’s everything you’ll need:
- 2 cups all-purpose flour – The foundation of your cookies. For a nuttier flavor, substitute half with whole wheat flour.
- 1 cup unsalted butter, softened – Essential for that rich, buttery taste. European-style butter adds extra richness.
- 3/4 cup granulated sugar – Provides sweetness and helps create crispy edges.
- 3/4 cup light brown sugar, packed – Adds moisture and a subtle caramel undertone. Dark brown sugar intensifies this flavor.
- 2 large eggs, room temperature – Binds ingredients and adds structure. Flax eggs work for vegan versions.
- 2 teaspoons pure vanilla extract – The star flavoring in chipless cookies. Use quality extract for best results.
- 1 teaspoon baking soda – Creates lift and spread for perfect texture.
- 1/2 teaspoon salt – Enhances all other flavors and balances sweetness.
- 1/4 teaspoon cinnamon (optional) – Adds warmth and complexity without overwhelming the classic flavor.
The quality of your ingredients directly impacts your final product. Room temperature butter and eggs incorporate more easily, creating a smoother dough with better texture. Fresh baking soda ensures proper rise, while high-quality vanilla extract elevates the entire flavor profile.
Timing
Time management is crucial when baking this chipless cookies recipe. Here’s a comprehensive breakdown of the time investment required:
Preparation Time: 15 minutes – This includes measuring ingredients, softening butter if needed, and mixing the dough. This is approximately 25% faster than recipes requiring ingredient chopping or melting chocolate.
Chilling Time: 30 minutes (optional but recommended) – Chilling the dough prevents excessive spreading and intensifies flavors.
Baking Time: 10-12 minutes per batch – Depending on your oven and desired crispness level.
Cooling Time: 5 minutes on the baking sheet, then 15 minutes on a wire rack.
Total Time: Approximately 75-80 minutes from start to finish, including one batch. Multiple batches add 10-12 minutes each. This efficient timeline makes these cookies perfect for last-minute gatherings or sudden sweet cravings.
Step-by-Step Instructions
Step 1: Prepare Your Workspace
Preheat your oven to 350°F (175°C). Line two baking sheets with parchment paper or silicone baking mats. This prevents sticking and ensures even browning. Position your oven racks in the upper and lower thirds for optimal heat circulation.
Step 2: Cream Butter and Sugars
In a large mixing bowl, combine softened butter, granulated sugar, and brown sugar. Using an electric mixer on medium speed, beat for 3-4 minutes until the mixture becomes light, fluffy, and pale in color. This incorporation of air is crucial for achieving the perfect cookie texture.
Properly creamed butter and sugar should increase in volume noticeably and feel smooth when rubbed between your fingers. This step creates tiny air pockets that expand during baking, resulting in tender cookies with ideal texture.
Step 3: Add Eggs and Vanilla
Add eggs one at a time, beating well after each addition. This ensures proper emulsification and prevents the mixture from separating. Pour in the vanilla extract and mix until completely incorporated. The mixture should appear smooth and cohesive.
Step 4: Combine Dry Ingredients
In a separate medium bowl, whisk together flour, baking soda, salt, and cinnamon if using. Whisking aerates the flour and evenly distributes the leavening agents, preventing pockets of baking soda that could create an unpleasant taste.
Step 5: Mix Wet and Dry Ingredients
Gradually add the flour mixture to the butter mixture in three additions. Mix on low speed just until no flour streaks remain. Overmixing develops gluten, resulting in tough, cake-like cookies rather than tender ones. The dough should be thick, slightly sticky, and cohesive.
Step 6: Chill the Dough (Optional)
Cover the bowl with plastic wrap and refrigerate for 30 minutes. While optional, this step significantly improves texture and flavor. Chilled dough spreads less during baking, creating thicker cookies with chewier centers. The resting period also allows flour to fully hydrate.
Step 7: Shape the Cookies
Using a cookie scoop or tablespoon, portion dough into balls approximately 1.5 tablespoons each. Roll between your palms to create uniform spheres. Place them 2 inches apart on prepared baking sheets, allowing room for spreading. For crispier cookies, flatten slightly with your palm.
Step 8: Bake to Perfection
Bake for 10-12 minutes, rotating pans halfway through for even browning. Cookies are done when edges are golden brown but centers still look slightly underdone. They’ll continue cooking on the hot pan after removal, achieving perfect texture.
Avoid overbaking, which is the most common mistake. Cookies should appear soft in the center when removed from the oven. They firm up considerably during cooling.
Step 9: Cool Properly
Let cookies rest on the baking sheet for 5 minutes. This allows them to set without breaking. Transfer to a wire rack to cool completely. This prevents soggy bottoms and ensures even cooling throughout.
Nutritional Information
Understanding the nutritional profile of your chipless cookies recipe helps you enjoy them mindfully. Per cookie (based on 36 cookies from this recipe):
Calories: 110 – Approximately 15% fewer calories than chocolate chip cookies due to the absence of chocolate.
Total Fat: 6g (8% DV) – Primarily from butter, providing rich flavor and satisfying texture.
Saturated Fat: 3.5g (18% DV) – Moderate amount typical for butter-based cookies.
Cholesterol: 25mg (8% DV) – From butter and eggs.
Sodium: 95mg (4% DV) – Controlled salt content enhances rather than overwhelms.
Total Carbohydrates: 14g (5% DV) – Energy-providing sugars and flour.
Sugars: 8g – Natural sweetness without excessive sugar content.
Protein: 1.5g – Modest protein from eggs and flour.
These cookies provide quick energy and satisfaction in moderate portions. The absence of chocolate chips reduces overall sugar and fat content compared to traditional chocolate chip cookies, making them a slightly lighter indulgence while maintaining incredible flavor.
Healthier Alternatives for the Recipe
Adapting this chipless cookies recipe to meet various dietary needs doesn’t mean sacrificing taste. Here are proven modifications that maintain deliciousness while addressing health considerations:
Reduce Sugar: Decrease total sugar by 1/4 cup without significantly impacting texture. The cookies will be less sweet but still satisfying. Alternatively, replace half the sugar with coconut sugar for a lower glycemic option.
Whole Grain Flour: Substitute up to half the all-purpose flour with whole wheat pastry flour. This adds fiber and nutrients while maintaining tender texture. White whole wheat flour provides whole grain benefits with milder flavor.
Healthier Fats: Replace half the butter with Greek yogurt or unsweetened applesauce. This reduces saturated fat while adding moisture. Coconut oil is another alternative that provides different but equally delicious flavor.
Vegan Version: Use vegan butter and replace eggs with flax eggs (2 tablespoons ground flaxseed mixed with 6 tablespoons water, let sit 5 minutes). The texture differs slightly but remains excellent.
Gluten-Free Option: Use a 1:1 gluten-free baking flour blend. Add 1/4 teaspoon xanthan gum if your blend doesn’t include it. Results are remarkably similar to traditional versions.
Protein Boost: Add 2 tablespoons of vanilla protein powder, reducing flour by the same amount. This increases protein content without altering flavor significantly.
Natural Sweeteners: Replace granulated sugar with maple sugar or date sugar for unrefined sweetness with additional minerals and antioxidants.
Serving Suggestions
The versatility of chipless cookies makes them perfect for countless occasions and pairings. Their subtle sweetness complements rather than competes with other flavors.
Classic Pairing: Serve warm with a cold glass of milk for the ultimate nostalgic experience. The buttery richness pairs perfectly with milk’s creamy coolness.
Coffee Companion: These cookies are exceptional alongside your morning coffee or afternoon espresso. Their balanced sweetness doesn’t overwhelm coffee’s complex flavors.
Ice Cream Sandwiches: Use two cookies to sandwich your favorite ice cream flavor. The simple cookie flavor allows the ice cream to shine while providing perfect texture contrast.
Dessert Platter: Arrange on a platter with fresh berries and whipped cream for an elegant yet simple dessert presentation.
Gift Giving: Package in decorative tins or cellophane bags tied with ribbon. Their classic appearance and universal appeal make them perfect gifts for any occasion.
Breakfast Treat: Pair with Greek yogurt and fresh fruit for a balanced breakfast that feels indulgent.
Crumbled Topping: Crush cooled cookies and sprinkle over pudding, yogurt parfaits, or ice cream for added texture and flavor.
Common Mistakes to Avoid
Even experienced bakers encounter challenges. Awareness of these common pitfalls ensures success every time you make this recipe:
- Using Cold Butter: Cold butter doesn’t cream properly, resulting in dense cookies. Always soften butter to room temperature, which takes about 30-60 minutes on the counter.
- Overmixing the Dough: Excessive mixing after adding flour develops gluten, creating tough cookies. Mix just until ingredients combine for tender results.
- Skipping the Chill Time: While optional, chilling prevents excessive spreading and intensifies flavors. Warm dough spreads too thin, creating crispy wafers rather than chewy cookies.
- Overcrowding the Baking Sheet: Cookies need space to spread. Place them at least 2 inches apart to prevent merging into one giant cookie.
- Overbaking: The number one mistake. Cookies continue cooking after removal from the oven. Remove them when centers look slightly underdone for perfect texture.
- Incorrect Oven Temperature: Use an oven thermometer to verify accuracy. Many ovens run hot or cold, significantly affecting results.
- Not Rotating Pans: Ovens have hot spots. Rotating pans halfway through baking ensures even browning and consistent texture.
- Measuring Flour Incorrectly: Scooping flour directly with the measuring cup compacts it, adding too much. Spoon flour into the cup and level off for accurate measurement.
Storing Tips for the Recipe
Proper storage maintains freshness and flavor, allowing you to enjoy these cookies for days after baking.
Room Temperature Storage: Store completely cooled cookies in an airtight container at room temperature for up to 5 days. Place parchment paper between layers to prevent sticking. Add a slice of bread to the container to maintain chewiness—the cookies absorb moisture from the bread.
Refrigerator Storage: While not necessary, refrigeration extends shelf life to 10 days. Bring cookies to room temperature before serving for best flavor and texture.
Freezing Baked Cookies: Freeze cookies in a single layer on a baking sheet until solid, then transfer to freezer bags or containers. They keep for up to 3 months. Thaw at room temperature for 15-20 minutes before enjoying.
Freezing Cookie Dough: Portion dough into balls and freeze on a baking sheet. Once solid, transfer to freezer bags. Frozen dough balls can be baked directly from frozen—just add 2-3 minutes to baking time. This method provides fresh-baked cookies anytime.